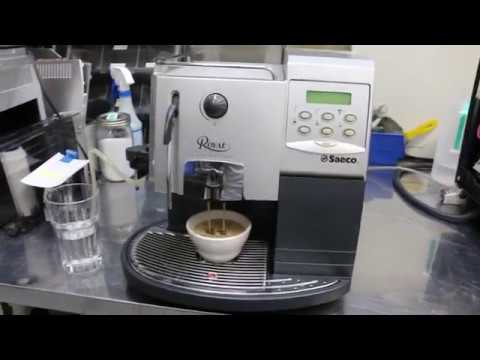
Espresso Machine Troubleshooting Guide

Expert solutions from Kanen Coffee — Berkeley's espresso machine repair specialists since 2011

Quick Problem Finder

Espresso machine repair bench at Kanen Coffee Berkeley
Your Safety Matters — Please Read Before Servicing

We care about your well-being. Espresso machines involve real hazards — extreme heat, high-pressure steam, scalding water, mains electricity, and chemical cleaning agents. Please take a moment to review these precautions before working on your machine.

Heat & Pressure

Boilers reach 90–130 °C and brew circuits operate at 8–9 bar. Always unplug your machine and wait at least one hour — or until all surfaces are cool to the touch — before opening it up. Open steam wands or the hot water tap to fully depressurise before any internal work.

Mains Electricity

Machines run at 120–240 V AC and capacitors can hold a charge even after unplugging. Never work on any internal components while the machine is plugged in. If you are not trained in electrical safety, please do not open the machine — leave it to a qualified technician.

Chemical Safety

Never mix cleaning products — combining descalers, backflush detergents, and cleaning tablets can produce toxic fumes or harmful reactions. Always follow the manufacturer’s instructions, use one product at a time, and rinse thoroughly between steps.

Know Your Limits

There is no shame in calling a professional. If a repair feels beyond your comfort level, please reach out to us or another qualified service technician. Your safety is always more important than any repair.

1. Why is my espresso machine not pumping water?

Common causes: Empty water tank, clogged intake filter, air lock in system, or faulty pump motor.
Solution:
• Check and fill water tank, ensure it's properly seated
• Clean water intake filter (usually at tank connection)
• Purge air by running hot water without portafilter
• Listen for pump noise - no sound may indicate pump failure requiring professional repair

2. Why is my espresso coming out too slowly?

Causes: Too fine grind, overfilled basket, excessive tamping pressure, or clogged shower screen.
Solution:
• Adjust grinder to coarser setting
• Use proper dose (18-20g for double shot)
• Apply consistent 30lb tamping pressure
• Clean shower screen and group head weekly

3. Why is my espresso weak or watery?

Causes: Too coarse grind, stale beans, under-dosing, or insufficient tamping.
Solution:
• Grind finer until extraction takes 25-30 seconds
• Use fresh beans (roasted within 2-4 weeks)
• Verify dose weight with scale
• Ensure level, firm tamping

4. Why is my espresso machine leaking water?

Causes: Worn group head gasket, cracked water tank, loose connections, or damaged internal tubing.
Solution:
• Replace group gasket annually (DIY possible)
• Check tank for hairline cracks
• Tighten all visible connections
• Internal leaks require professional service

5. Why is my espresso machine not heating up?

Causes: Tripped thermal fuse, faulty thermostat, broken heating element, or heavy scale buildup.
Solution:
• Perform thorough descaling first
• Check power outlet and machine fuses
• Allow 15-20 minutes warmup time
• If no improvement, heating element likely needs replacement

6. Why is my steam wand not working?

Causes: Clogged steam tip, milk residue blockage, or insufficient boiler pressure.
Solution:
• Soak tip in hot water or descaling solution
• Use pin to clear steam holes
• Always purge before and after steaming
• Check boiler pressure gauge (1-1.5 bar normal)

7. How do I descale my espresso machine?

Complete descaling process:
1. Mix descaling solution with water per manufacturer instructions
2. Fill water tank with solution
3. Run brew cycle halfway, pause 15-20 minutes
4. Complete cycle, run solution through steam wand
5. Rinse thoroughly with 2-3 tanks of fresh water
6. Run a test shot before making coffee
Frequency: Quarterly (every 3 months). Use soft water to reduce scale buildup.

8. Why does my espresso taste bitter?

Causes: Over-extraction, water too hot, dark roast beans, or dirty equipment.
Solution:
• Coarsen grind or reduce extraction time
• Verify water temperature (195-205°F ideal)
• Try medium roast beans
• Deep clean all coffee contact surfaces

9. Why does my espresso taste sour?

Causes: Under-extraction, water too cool, light roast beans, or channeling.
Solution:
• Grind finer to increase extraction
• Ensure machine fully heated (20+ minutes)
• Improve distribution and tamping technique
• Consider darker roast for less acidity

10. My grinder runs but no coffee comes out.

Causes: Burr jam from foreign object, broken burr carrier, worn burrs, or clogged chute.
Solution:
• Remove hopper and check for stones or debris
• Clean thoroughly with brush
• Inspect burrs for damage or wear
• Replace burrs if edges are rounded (every 300-500 lbs)

11. Why is there no crema on my espresso?

Causes: Stale beans, incorrect grind, low pressure, or using pre-ground coffee.
Solution:
• Use beans roasted within 2-4 weeks
• Ensure 9 bar brewing pressure
• Grind just before brewing
• Check machine pressure gauge during extraction

12. Why is my espresso machine making loud noises?

Causes: Vibration pump normal operation, worn pump, scale buildup, or loose components.
Solution:
• Some noise is normal for vibration pumps
• Descale if grinding/whining sounds occur
• Tighten loose panels or drip tray
• Grinding noise may indicate pump replacement needed

13. My pressure gauge shows incorrect readings.

Causes: Faulty gauge, pressure relief valve issues, or actual pressure problems.
Solution:
• Test with blind basket to verify actual pressure
• Clean or replace OPV (over-pressure valve)
• Gauge replacement is usually simple DIY fix
• Professional calibration may be needed

14. Machine keeps running and overfills shots.

Causes: Faulty flow meter, stuck button, or programming issue on automatic machines.
Solution:
• Reset to factory settings if programmable
• Clean button contacts with alcohol
• Manually stop shots until repaired
• Flow meter may need replacement

15. Display shows error codes.

Common codes: Fill tank, descale needed, grinder blocked, or service required.
Solution:
• Consult manual for specific code meaning
• Try power cycling (off for 30 seconds)
• Perform indicated maintenance
• Some codes require technician reset

16. Machine gets too hot or overheats.

Causes: Faulty thermostat, scale preventing heat dissipation, or PID controller malfunction.
Solution:
• Descale thoroughly
• Check for blocked ventilation
• Thermostat replacement often required
• Don't use until repaired (fire hazard)

17. Portafilter is stuck or won't lock in.

Causes: Coffee grounds in threads, worn gasket, or bent portafilter ears.
Solution:
• Clean group head threads thoroughly
• Replace gasket if over 1 year old
• Check portafilter ears for damage
• Never force - can damage machine

18. Machine won't turn on at all.

Causes: Power supply issue, blown fuse, faulty switch, or safety thermostat tripped.
Solution:
• Test outlet with another appliance
• Check power cord for damage
• Inspect internal fuse (unplug first)
• Reset thermal safety switch if accessible

19. Coffee has metallic or strange taste.

Causes: New machine needs seasoning, stale water sitting in the tank, chlorine-heavy tap water, or scale leaching into the brew path.
Solution:
• Run 10-20 blank shots through a new machine to season the brass and stainless parts
• Descale quarterly and backflush regularly to keep minerals from flaking into the cup
• Use filtered water with 50-150 ppm TDS (not zero-mineral distilled or super-hard tap water)
• Swap the in-tank filter every 2 months and flush 2-3 tanks of fresh water afterward
• Clean and dry the reservoir weekly so biofilm doesn't add funky flavors

20. Should I repair or replace my machine?

Consider repair if:
• Machine is under 5 years old
• Repair cost is under 50% of replacement
• It's a quality brand (Lelit, Breville, Rancilio, La Marzocco, Jura)
• Only needs gaskets, seals, or descaling

Consider replacement if:
• Over 10 years old with major issues
• Multiple components failing
• Repair exceeds 60% of new machine cost
• Parts are discontinued

We sell: Lelit, Breville, Rancilio, Eureka, Baratza & more quality brands
Not sure if we fix your machine? See our complete repair list

21. Espresso shot channels or pours unevenly.

Causes: Uneven puck prep, clumps in the basket, basket not level, or gasket wear letting water sneak down one side.
Solution:
• Use a WDT/distribution tool (a paperclip works) to break up clumps before tamping
• Tap the portafilter to settle grounds, then tamp level with ~30 lbs of pressure
• Check that the machine is on level footing and the portafilter gasket isn't flattened
• Run a blank shot and watch flow—if it still jets sideways, the shower screen likely needs cleaning
• Consider adding pre-infusion (if available) to saturate the puck before full pressure

22. Pre-infusion doesn't start or stops too quickly.

Causes: Pre-infusion disabled in the menu, low water level, pump not primed, or a scaled flow meter/solenoid.
Solution:
• Confirm pre-infusion settings—on Breville/Lelit/Jura you can set duration in the menu or app
• Re-seat the water tank and purge air by running 2-3 blank shots
• Descale to clear the flow meter and group solenoid so they sense water movement again
• If the machine logs errors after a few seconds, the pump capacitor may be weak—book service

23. Group head sputters or sprays water everywhere.

Causes: Clogged shower screen, scale behind the screen, warped dispersion plate, or a gasket that isn't sealing.
Solution:
• Backflush with Cafiza (if your machine supports backflushing) to clear coffee oils
• Remove the shower screen and soak it in hot water + espresso cleaner, brush both sides
• Inspect the dispersion screw/plate and replace if pitted
• Install a fresh group gasket every 12 months so the portafilter seals evenly

24. Brew pressure is stuck below 8 bar or spikes above 10.

Causes: Mis-adjusted OPV (over-pressure valve), failing vibration pump, clogged puck, or heavy scale restricting flow.
Solution:
• Test with a blind basket—if pressure is still low, the pump or OPV needs adjustment
• Clean/descale the OPV and flow path; a stuck spring will cause runaway pressure
• Dial in grind and dose: too fine or overdosed baskets drive pressure sky-high
• If a rotary pump machine hunts between 6-10 bar, the pump vanes are likely worn (service visit)

25. My grinder is jammed and the motor just hums.

Causes: Bean fragments wedged between burrs, foreign objects (stones, screws), oily beans compacted in the chute, or mis-seated burr carrier.
Solution:
• Cut power immediately, remove the hopper, and scoop/vacuum out beans above the burrs
• Inspect the burr chamber for stones or screws and pull them with tweezers
• Remove the upper burr carrier, scrub both burrs, and clear the chute with a brush or compressed air
• Reinstall the carrier, dial all the way coarser, and pulse the grinder while lightly tapping the case
• Once it spins freely, dial back to your setting and purge a small dose to confirm smooth feed

Still jammed? The motor capacitor or burr carrier may be damaged—schedule service so we can rebuild it.

☕ Grinder Troubleshooting Guide

Common Grinder Problems & Solutions

1. Grinder runs but no coffee comes out:
• Check for foreign objects (stones, sticks) jamming burrs
• Inspect burr carrier for cracks
• Clean clogged chute with brush
• Replace worn burrs (edges should be sharp, not rounded)

2. Inconsistent grind size:
• Worn burrs need replacement (every 300-500 lbs coffee)
• Check burr alignment and calibration
• Clean coffee oil buildup
• Ensure hopper is properly seated

3. Grinder making loud grinding noise:
• Foreign object in burrs (immediately stop and check)
• Burrs touching (needs recalibration)
• Worn burr carrier or motor bearings
• Coffee beans too oily or stale

4. Grinder won't turn on:
• Check safety switches (hopper, grounds bin)
• Test thermal overload protection (let cool 30 min)
• Inspect power cord and switch
• Motor capacitor may need replacement

5. Coffee clumping or static:
• Add 1-2 drops of water to beans (RDT method)
• Use anti-static spray on catch bin
• Check humidity levels (40-60% ideal)
• Clean chute and exit point regularly

6. Grinder jam (motor hums but burrs won't spin):
• Unplug immediately and remove the hopper
• Vacuum/scoop out beans above the burrs and look for stones or screws
• Remove the upper burr carrier, brush burrs and chute clean, then reinstall
• Dial all the way coarser and pulse while gently tapping the case to free the burrs

Grinder Maintenance Schedule

Daily:
• Empty and wipe hopper
• Brush out grounds from chute
• Clean dosing area

Weekly:
• Deep clean with grinder cleaning tablets
• Remove and clean hopper thoroughly
• Vacuum around burr chamber

Monthly:
• Remove upper burr and clean both burrs
• Check burr sharpness and alignment
• Clean all coffee oil residue

Annually:
• Professional service and calibration
• Replace burrs if needed
• Motor bearing inspection

Grinder Brands We Service

We sell and service: Eureka, Baratza, Breville grinders
We also repair: Mazzer, Compak, Mahlkonig, Rancilio, and most major brands

Need grinder repair? Book an appointment or call (510) 859-4425

🤖 Home Super-Automatic Troubleshooting

De'Longhi Magnifica · Jura · Saeco/Philips · Gaggia · Melitta · Siemens EQ

Pump runs but no water comes out — how to purge an air lock

Causes: Air trapped in the pump or water line after the tank ran dry, was removed, or after descaling. The pump hums and strains but no water flows.
Solution:
• Fill the water tank completely and reseat it firmly
If your machine has a steam wand: activate the steam or hot water function for 10–15 seconds — this draws water through a different path and breaks the air lock. You may hear sputtering, then water will flow normally
If your machine is fully automatic (no steam wand): use the hot water dispensing button from the menu and run it for 15–20 seconds until steady flow appears
• Repeat 2–3 times if needed — stubborn air locks clear with successive cycles
• If the machine ran completely dry, it may need 2–3 full hot water cycles before the pump fully re-primes
• After descaling: always run the full rinse cycles the machine asks for — these also serve to re-prime the pump with fresh water
• If no water flows after all of the above: the pump inlet filter may be clogged — remove the water tank and check for the small mesh screen at the connection point
After repairs or shipping: always purge the steam wand or run the hot water function before your first brew. Moving or shipping a machine shifts water out of the pump and lines, creating air pockets — a 15–20 second purge cycle clears them and prevents the pump from running dry on startup

Brew unit stuck, jammed, or won't eject the puck

Causes: Coffee oil and grounds buildup seizing the brew unit slides; dried O-rings; physical cracking from forcing the unit when stiff.
Solution:
• Open the side door and pull out the brew unit (De'Longhi: left side; Saeco/Philips: right side; Jura E/S series: front panel after pressing the maintenance button)
• Rinse under warm — not hot — running water. Never put it in the dishwasher
• Air dry 30 minutes, then apply 2–3 drops of food-grade silicone grease to the sliding rails
• Run a cleaning tablet cycle to clear internal residue
• If completely stuck: power off, wait 2 minutes, power on — some machines unlock the brew unit on restart
Never force it — forcing cracks the plastic drive arm
• If the unit won't come out after all steps: book a service appointment

Coffee is watery, weak, or has no crema

Causes: Grind setting too coarse for current burr wear; coffee strength set too low; stale beans; using pre-ground coffee in the bean hopper.
Solution:
• Increase coffee strength to maximum in the machine menu (usually 5/5 or "Extra Strong")
• Adjust grind one step finer — the dial is inside or under the bean hopper. Only adjust while the grinder is running
• Jura: adjust from A → B → C toward fine. De'Longhi: rotate toward the fine icon
• Run 2–3 brews after adjusting to flush old grounds before evaluating
• If still watery at max strength + finest grind: burrs are worn and need replacement (steel burrs last ~10,000–15,000 cups; ceramic ~20,000+)
• Do not use pre-ground coffee in the bean hopper unless your machine has a separate bypass doser chute

Machine stuck in descaling loop or won't finish descaling

Causes: Wrong descaling product used; cycle was interrupted (power loss, cancel pressed, ran out of water); water hardness setting not matching actual water hardness.
Solution:
• Use the correct descaler: Jura → Jura descaling tablets · De'Longhi → EcoDecalk · Saeco/Philips → CA6700 · Siemens/Bosch → CTL636
• If stuck mid-cycle: restart and look for a "Resume" or "Restart Descaling" option in the menu
• Run a second full descaling cycle — heavily scaled machines often need two passes
• After descaling, flush 2–3 full tanks of plain water through the hot water button
• Check the water hardness setting in the menu — use the test strip that came with your machine to measure hardness and set it correctly
• Jura owners: also verify the Claris/CLEARYL filter is registered in the maintenance menu — filter tracking and descaling are independent

Milk system not frothing, blocked, or producing watery foam

Causes: Dried milk protein blocking the carafe, mixing tube, or venturi nozzle. Milk dries solid within hours if the auto-rinse is skipped even once.
Solution:
• Always run the auto-rinse immediately after every milk drink — do not skip or defer it
• Fully disassemble the milk carafe or LatteGo unit and soak all parts in warm water with a dishwasher tablet or Rinza milk cleaner for 30 minutes
• Run the manual milk cleaning cycle (usually under Maintenance → Clean Milk System)
• Use a thin pin or the cleaning pin that came with your machine to clear the mixing chamber nozzle
• Philips LatteGo (3200/4300/5400): all parts are dishwasher-safe — fully dishwasher-clean it, then check the AquaClean filter (a clogged filter reduces steam pressure)
• Jura Fine Foam unit: use only a soft cloth — never a metal brush, the micro-mesh screen is fragile
• If cleaning doesn't help: run a full descaling cycle, as scale inside the steam circuit reduces frothing pressure

Coffee grounds appearing in the cup

Causes: Torn or worn brew unit filter screen; failed O-ring seals on the brew unit piston; grind set too fine for the current screen condition.
Solution:
• Remove the brew unit and hold the filter screen up to a light — look for holes, tears, or crushed mesh
• If the screen is intact, inspect the O-rings: they should be soft and round, not cracked or flattened
• Try coarsening the grind one step — if grounds disappear, the grind was too fine
• De'Longhi: replace the brew unit O-ring seal kit (~$8–$12, search "[your model] brew unit seal kit"). Replace the large flat washer seal and both shaft O-rings
• Jura: the brew group cannot be user-disassembled — if O-rings have failed, a replacement brew group is needed from a Jura service dealer
• Also check the bypass doser chute (the pre-ground slot): if clogged and overflowing, loose coffee can reach the cup without going through the brew unit

Error code on display or machine refuses to brew

Causes: Most error codes are maintenance reminders or triggered sensors — not hardware failures. Common triggers: mis-seated drip tray, full grounds container, empty tank contacts dirty.
Solution by error type:
"Fill water" with full tank: Remove and reseat the tank. Wipe the metal contact pins inside the tank well with a damp cloth or cotton swab + white vinegar
"Insert drip tray": Push the drip tray fully in and ensure the float inside is lying flat (not stuck up)
"Empty grounds container": Empty it — the counter is separate from the visual fill level
"Maintenance / cleaning required": Run the requested cleaning or descaling cycle
"Grinder error": Check for a bean jam, refill the hopper, then perform a grinder reset (see your manual)
• After resolving the cause: unplug for 30 seconds, then power on
• Jura owners: use the free Jura Diagnostics app (iOS/Android) to decode E## error codes and view sensor readings
• De'Longhi ECAM service manual is available at Home-Barista.com and documents every error icon

Coffee dispenses lukewarm or not hot enough

Causes: Temperature setting too low; cold ceramic cup stealing heat; heavy thermoblock scale insulating the heating element.
Solution:
• Set coffee temperature to maximum in the machine menu (usually High or 3/3)
• Preheat the cup: use the machine's hot water button to dispense 30–50ml into the cup, discard it, then brew into the warm cup
• Enable cup warming if your machine has a warming plate or tray on top — place cups there for 5 minutes before brewing
• Run a full descaling cycle — heavy thermoblock scale is the most common cause of temperature loss over time
• De'Longhi ECAM: temperature setpoint is adjustable in the service menu (hold the "?" info button while powering on) — factory default is 92°C, can be raised to 96°C
• If temperature doesn't improve after descaling, the thermoblock may need replacement — book a service appointment

Home Super-Automatic Brands We Service

We service all major home super-automatic brands: De'Longhi (Magnifica, PrimaDonna, Eletta), Jura (E series, S series, ENA), Saeco/Philips (3200–5400, Incanto, GranAroma), Gaggia (Babila, Magenta), Melitta, Siemens/Bosch EQ series, and more.

Most common repairs: brew unit replacement, grinder burr replacement, thermoblock descaling, milk system deep clean, O-ring seal kits

Need service? Book an appointment or call (510) 859-4425 · Mon–Fri 12pm–5pm · Berkeley, CA

Which pump does my espresso machine use? (ULKA EX5 vs EP5)

Why it matters: Installing the wrong pump can cause leaks, incorrect pressure, or no flow. ULKA EX5 and EP5 look similar but have different fittings and mounting configurations.
How to identify your pump:
• Look for a label stamped on the pump body — EX5 has a snap-fit plastic elbow at the outlet; EP5 has a straight barb outlet
• EX5: 3/16" (4.7mm) outlet barb, lower pressure rating — used in most home single-boiler machines
• EP5: 1/4" (6.3mm) outlet barb, higher flow rate — used in prosumer and commercial machines
• Match voltage: 120V (US) vs 230V (EU) — look for the voltage printed on the pump label
• Mounting: verify the bracket orientation before ordering — some machines use horizontal, some vertical mount
• If unsure: photograph your existing pump and send to your parts supplier before ordering
• US sources: Espresso Parts, Whole Latte Love, Chris' Coffee; EU: Caffe Tech, Espresso Outlet
• Rotary pump upgrade: machines running >500 shots/month benefit from a rotary pump — quieter, longer-lasting, but requires plumbing modification

Step-by-step steam diagnosis: nozzle vs. valve vs. boiler

The problem: Steam output reduced or absent. The cause is almost always one of five things — nozzle blockage, open wand check, valve failure, solenoid fault, or low boiler pressure.
5-step diagnosis:
Step 1 — Soak the nozzle tip (5 min)
Remove the steam wand tip and soak in hot water + a few drops of dish soap. If steam returns after reinstalling: nozzle was blocked. Done.

Step 2 — Open wand test
With wand tip removed, open the steam valve fully. Strong, dry steam from the bare wand = nozzle is your only issue. Weak or wet steam from bare wand = proceed to step 3.

Step 3 — Listen for valve click
Press the steam button. You should hear a click from the solenoid valve. Click but no steam flow = valve plunger stuck or scale-blocked. No click = electrical fault — test solenoid coil resistance (should read 10–30Ω).

Step 4 — Check boiler pressure (machines with gauge)
Steam boiler should reach 1.0–1.5 bar. If below 0.8 bar: thermostat or pressurestat may be failing. Adjust or replace.

Step 5 — Scale inside the steam boiler
Run a full descale cycle with citric acid (15g per liter). Scale on the heating element is the most common cause of gradual steam loss. If descaling doesn't restore pressure: heating element may need replacement — book a service appointment

Espresso machine error codes explained (Jura, De'Longhi, Breville, Saeco)

Key rule: About 80% of error codes on super-automatics are maintenance alerts (empty tray, descale needed, clean brew unit) — not hardware failures. Always run maintenance tasks first before replacing parts.
Common codes by brand:
Jura: E1 = grinder blocked (remove beans, clear jam); E8 = coffee grounds chute blocked (remove brew unit, clear path); A1 = no water (check tank, inlet filter); A3 = descale required (run descale cycle)

De'Longhi Magnifica/Perfecta: AL1 = descale now; AL2 = water tank empty; AL3 = grounds container full; AL6 = coffee unit fault (remove, rinse, reinsert brew unit)

Breville: Maintenance alerts shown as text. Hardware faults show as "C" codes in service mode — consult service manual or authorized technician

Saeco/Philips: Blinking red/orange light patterns indicate maintenance needs — count blinks and check your model's specific pattern chart in the manual

If code persists after maintenance: A code that reappears immediately indicates hardware failure. Common: flow sensor, temperature sensor, pump, or brew unit motor. Test component resistance with multimeter or book a service appointment

How to find an internal espresso machine leak

Common origins: Group head gasket (30%), hose barb fittings (30%), boiler fittings (20%), pump head (10%), solenoid valve body (10%). Never assume it's "just the gasket" without checking.
Finding the source:
• Remove housing panels (unplug first, replug to run) and observe with flashlight during a brew cycle
• Note timing: leak during brewing = pump/group/solenoid; leak during steam = steam valve or boiler fitting; continuous idle drip = check valve failure
• Dry all components, run a cycle, then touch each joint with dry paper towel — first wet spot is your source
Check in this order:
1. Group head gasket — squeeze portafilter; wiggle or drip = replace gasket ($5–8, 30 min)
2. Hose barb fittings — run finger along every hose joint during pump operation
3. Boiler fittings — look for white mineral deposits (crystallized scale = slow ongoing leak)
4. Pump body — drip from pump itself during operation = cracked body or loose fitting
• Hose replacement: match inner diameter exactly (usually 8mm or 10mm ID food-grade silicone)
• Boiler fitting leaks: use food-safe PTFE tape; hand-tight plus 1–2 turns only — do not overtighten
• If water has reached electronics: clean connectors with isopropyl alcohol, check for corroded wiring — book a service appointment

Complete descaling guide: solution, frequency, and full procedure

Why descale: Scale is the #1 cause of preventable machine failure. It insulates heating elements, restricts water flow, and eventually causes element burnout. A proper descale takes 30–60 minutes.
Choose your solution:
• Citric acid (best value): 15–20g dissolved in 1 liter of water — effective on light-to-moderate scale
• Brand descalers (De'Longhi EcoDecalk, Jura descaler): pre-measured, use if warranty requires
• Avoid: white vinegar (too mild, leaves smell), household descalers (may damage seals)

Procedure:
1. Super-automatics: use guided descale mode in settings menu — follow on-screen prompts exactly
2. Manual machines: fill tank with solution, run 30-second bursts through group head and steam wand alternately until tank is empty
3. Rinse cycle: run 2–3 full tanks of fresh water through the machine — taste a shot of water; if acidic, rinse again
4. Verify: extraction should return to 25–30 seconds; steam should be noticeably stronger

Frequency by water hardness:
• Soft water (<7 gpg): every 3–4 months
• Medium (7–15 gpg): every 2–3 months
• Hard water (>15 gpg): monthly, or use a water filter
• If no improvement after descaling: thermoblock or element may need mechanical cleaning or replacement — book a service appointment

What does a professional espresso machine tune-up include?

Why professional service: Home maintenance (descaling, backflushing) cleans accessible parts but doesn't address seal wear, OPV calibration drift, or corrosion on internal connections — issues that accumulate silently over years.
What we do at every tune-up:
Mechanical: Group head gasket replacement (done every service regardless of condition) · steam wand O-ring inspection · check valve inspection · pump pressure measurement (target: 8–9 bar)

OPV calibration: Over-pressure valve set to spec — most machines drift 0.5–2 bar over time. Verified with calibrated pressure gauge.

Deep cleaning: Manual boiler descale (removes scale flush cycles don't reach) · group head soaking · steam wand ultrasonic cleaning · drain path cleaning

Electrical/safety: Wiring harness inspection for heat damage · heating element resistance test · PCB capacitor check · thermostat/PID accuracy verification

How often:
• Casual home use (1–2 shots/day): every 18–24 months
• Moderate home use (3–5 shots/day): every 12 months
• Office/light commercial: every 6 months

Cost: $100–200 for home machines, $150–300 for prosumer, $250–500 for commercial (parts additional ~$20–40)
Book a tune-up appointment →

Built-in grinder problems: motor vs. burrs vs. blockage

Three categories: Burr wear (poor quality output), blockage (jam or stall), motor failure (no movement). The diagnosis approach is different for each.
Diagnose by symptom:
Inconsistent or coarse grind despite fine setting:
• Run a grinder cleaner tablet (Grindz) first — coffee oil buildup causes inconsistent grinding
• Check burr condition: worn burrs produce excessive powder (fines) alongside coarser particles — compare to when machine was new
• Burrs typically last 500–800 kg of coffee (4–8 years of average home use)

Grinder stalls or jams:
• Use a wooden chopstick (not metal) to check for a bean stuck in the grinding chamber
• On super-automatics: remove and clean the brew unit — brew unit blockage can back-pressure the grinder
• Repeated jams with normal beans: burr gap alignment may need adjustment

Grinder produces no grounds (runs but no output):
• Check the ground coffee chute — on Jura/De'Longhi, it can compact solid with old grounds. Remove brew unit and clear chute.

No movement, no sound:
• Check for error codes (see error code guide above)
• Test motor: disconnect motor connector, measure resistance — DC motors read 1–10Ω. Open circuit = burned brushes or failed armature
• If motor runs but burrs don't spin: check the coupling between motor and burr carrier
• Need help? Book a grinder service appointment

What happens when you send your espresso machine in for service?

Our process: Every machine goes through intake assessment → diagnosis → repair → post-repair tune-up → calibration → final run test before return. Not every step is filmed — some procedures are repetitive or happen on multiple machines simultaneously.
Step-by-step:
1. Intake assessment: Physical inspection, power-on test to reproduce reported issue, water pressure and temperature measurement, work order created

2. Diagnosis: Systematic elimination of possible causes, component testing (pump, heating element, solenoid valves, sensors) — this is the "detective" phase shown in most of our videos

3. Repair: Parts sourced from inventory or ordered (parts arrival can add 1–3 days), then disassembly, replacement, and reassembly

4. Post-repair tune-up (every machine): Group head seal replacement · full descale cycle · backflush cleaning · steam wand O-ring inspection

5. Calibration: OPV pressure set to spec (8–9 bar) · shot extraction timed (target 25–30 sec) · steam output verified · error codes cleared

6. Final run test: Full brew and steam cycle before packaging — any issue found goes back to step 3

Turnaround: Simple repairs 1–3 business days (after parts arrival) · complex repairs 5–10 days · special-order parts 2–3 weeks
Warranty: 90 days on parts and labor for the specific repair
Send in your machine →

Looking to Buy an Espresso Machine?

Shop our curated selection of Lelit, Breville, Eureka, and Baratza at our online store

Visit the Shop Book a Repair
Call Us Book a Repair